Four layers of light, not one.
Most older bathrooms have one light in the middle of the ceiling, often combined with a heat lamp or fan. It lights the floor well and the face badly. A renovated bathroom usually works better with four separate layers, each doing one job.
| Layer | Job | Typical fittings |
|---|---|---|
| General | Even light for cleaning and moving around. | One or more ceiling lights or downlights. |
| Task (mirror) | Light on the face for shaving, make-up, contact lenses. | Front-lit mirror, wall lights either side, a light bar above. A backlit mirror only if its front output lights the face. |
| Shower | Enough light inside the shower, especially behind frosted or tinted glass. | A fitting the electrician specifies as permitted and rated for that position. |
| Low or feature | Night-time trips and atmosphere. | Sensor night light, strip light under a floating vanity or in a niche. |
You do not need all four in a small ensuite, but you should decide deliberately which ones you are skipping. The mirror layer is the one most often missed and the one most often regretted.
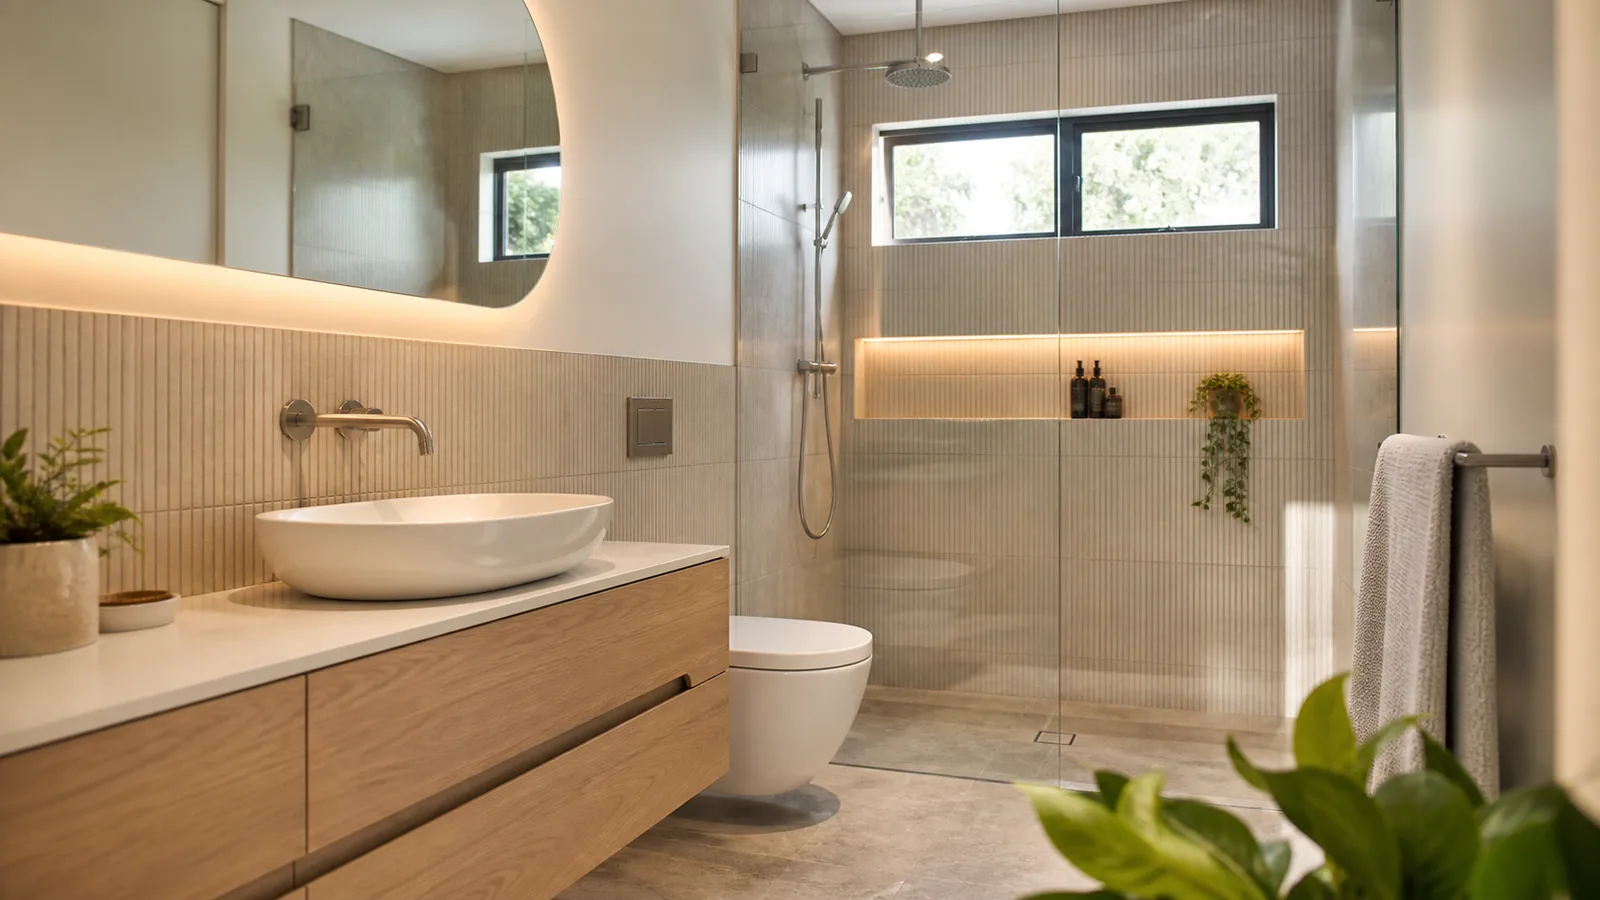
Mirror and face lighting.
A downlight directly above the mirror shines on the top of your head and casts shadows under your eyes, nose and chin. For a clear view of your face, light needs to come from the front or from both sides at roughly face height. There are three common ways to do it.
A backlit or front-lit LED mirror. The light is built into the mirror. Backlit mirrors give a soft glow around the edge, which looks good and helps as background light, but the glow is aimed at the wall and may put little light on your face. Front-lit mirrors, with a frosted band in the glass, aim light forward and usually do more for the face. Whichever type you like, check the actual model’s front output and see it switched on in a showroom if you can, before relying on it as the only mirror light. Many include a demister pad, which keeps the centre of the mirror clear after a shower, and some have a dimmer or colour adjustment. They need a power connection behind the mirror, so the mirror size and height have to be known when the electrician roughs in.
A mirror cabinet with lighting. This adds storage and can include lighting, a demister and sometimes a power point inside for toothbrush chargers. It is a good choice in small rooms where the vanity has little storage. The vanity and storage guide discusses recessed and surface-mounted cabinets.
A plain mirror with wall lights either side. This gives the most even face light and lets you choose the mirror and lights separately. It needs enough wall either side of the mirror and two light points set at the right height.
For width, a mirror a little narrower than the vanity usually looks settled. Hang it so the main users see their whole face comfortably, and remember that a vessel basin or a tall tap can push the bottom edge up.
Colour and brightness.
LED lights are sold by colour temperature, measured in kelvin. Around 3000 K is a warm white, similar to older halogen light. Around 4000 K is neutral white, crisper and closer to daylight. Many bathrooms use warm general lighting and a neutral mirror light, each on its own switch. Avoid mixing different colour temperatures in the same group of downlights, because it makes the ceiling look patchy.
Colour rendering, shown as CRI, describes how accurately a light shows colours. For make-up, skin tone and checking a shave, look for a high CRI on the mirror light. Brightness is shown in lumens. A dimmer on the general lighting lets the same room work as a bright morning space and a soft evening one.
Watch for glare. A bare downlight directly above a bath shines into the eyes of someone lying back in it, and a light directly above a glossy tiled floor reflects back at you. Downlights with the light source set back inside the fitting, or positioned to the side of where people look up, are more comfortable. In a small room, fewer good-quality lights usually work better than a grid of cheap ones.
Tile and finish colours change how bright a room looks. Dark tiles and timber absorb light, so a bathroom finished in those needs more light than a white one of the same size. Take a tile sample home and look at it under the colour temperature you are planning. The tile selection guide covers finish choices.
Wet-area rules and who does the work.
The Australian and New Zealand Wiring Rules, AS/NZS 3000, define zones around showers, baths and basins. Each zone limits what electrical equipment can be installed and how well it must be protected against water. Switches and power points also have to be kept out of certain areas. The NSW Government note on switches and sockets in wet areas is a readable regulator summary of how these zones affect placement. The rules are national; in Tasmania the regulator is CBOS.
In practice, the electrician decides what is permitted in each position and specifies the system, and you choose finishes within that. The IP rating is a two-number code; the second number describes water protection. A low-voltage LED strip is not automatically suitable for a shower or niche: the whole system, including the strip, its channel, the connections and the driver, has to be permitted for that zone, and the driver has to sit outside the wet area where it can be reached. Ask the electrician which system and rating each proposed fitting needs before you buy lights or a mirror, especially for anything in or near the shower.
Fixed electrical work in Tasmania must be done by a licensed electrical contractor. According to CBOS guidance for owners and occupiers, the contractor gives you a record of the electrical work when the job is finished, and for work beyond basic repairs or like-for-like replacement the contractor provides a Certificate of Electrical Compliance to TechSafe Australia, the state inspection service, which may contact you to arrange an inspection. Keep the record with your house papers.
Switches and controls.
Plan the switch plate by thinking through the day. First thing in the morning, someone wants the mirror light and fan without the full ceiling light. At night, someone wants the lowest light possible. When cleaning, someone wants everything on. Separate switches for general, mirror, shower and night light, plus the fan, cover most households.
Put switches just outside the door or inside it at a reachable height, clear of the wet areas the electrician identifies. A fan on a run-on timer keeps extracting after the light goes off, which helps dry the room. A sensor-controlled night light is useful for children and older relatives, and it avoids fumbling for a switch.
If someone in the household has limited mobility or poor eyesight, consider larger rocker switches, illuminated switches, and switch heights that suit a seated user. The accessible bathrooms page covers wider access planning.

Heating and the exhaust fan.
Tasmanian winters make bathroom heating a common request. The options are a ceiling unit combining heat lamps, a fan and a light; a wall or ceiling heater; a heated towel rail; or electric floor heating under the tiles. Each needs its own circuit or connection planned at rough-in, and floor heating must be laid before tiling.
A heated towel rail on a timer dries towels and adds a little warmth, which helps in a damp room. Heat lamp units warm a person quickly but do little for the room. Floor heating warms the whole floor and helps the floor dry after showering, but it takes time to heat and needs a thermostat. Talk through how the bathroom is used, not just what looks good.
The exhaust fan is part of the same plan. It needs to be ducted outside and sized for the room, and it should be switched so it actually gets used. The condensation and ventilation guide explains why fans matter so much on the Coast and what controls work best.
Daylight, windows and privacy.
Daylight is the best bathroom light, but in many houses the bathroom window is small, high or frosted, and in winter on the Coast it gives little light in the morning. Plan the electric lighting as if the window were not there, then use daylight as a bonus. If the window faces the street or a neighbour, frosted glass or a privacy film can keep daylight while obscuring the view, but how much it hides depends on the actual product, how close the viewer is and which side is brighter. At night, with the bathroom lit and outside dark, many obscure glasses and films still show shapes and silhouettes. Look at a sample from outside at night with the light on behind it, from where a neighbour or passer-by would stand, before deciding. Where night privacy matters, you may still need a blind or screen that suits a damp room; heavy fabric blinds reduce daylight and hold moisture, so they suit bathrooms less well.
A window beside the mirror gives good side light during the day. A window behind you when you face the mirror puts your face in shadow, so the mirror light matters more in that layout. If a new window or a skylight is part of the renovation, remember it becomes a cold surface in winter where condensation forms, and allow for that in the ventilation plan.
The rough-in walk-through.
Before the walls are lined, ask for a short walk-through with the renovator or electrician. Stand in the room and check each marked point: the light positions, the mirror connection height and centre, the switch heights, the fan position, the towel rail connection and any niche or vanity lighting. Hold a tape measure against the planned mirror and imagine the basin in place. It is the last chance to move anything cheaply.
Take photos of every wall with the cables visible and a tape measure in the frame, and keep them with the record of electrical work. Treat them as a rough reference only. Cables can be moved or added after the photo, the photo does not show depth, and a measurement taken from a photo is easy to get wrong once tiles and fittings change the reference points. The photos do not show that any spot is safe to drill. Before fixing a hook, rail or cabinet into a finished wall, have the location checked properly, which for anything near switches, power points, lights or the vanity usually means asking an electrician, and use fixings that suit the wall and the waterproofing.
Hypothetical example: a dim main bathroom.
Hypothetical example
A family bathroom has one ceiling unit with two heat lamps, a centre light and a fan, all on one bank of switches. The mirror is lit from above, the shower is dim behind its frosted screen, and the heat lamps get used as the main light in winter.
The renovation plan separates the jobs. Two warm downlights give general light on a dimmer. A front-lit mirror with a demister, chosen after seeing it lit in a showroom, gives neutral light on the face and is wired to a connection the electrician sets at rough-in. The electrician specifies a light for the shower that is permitted and rated for that position. The fan moves to a separate switch with a run-on timer, and heating shifts to a heated towel rail on a timer. A low sensor light is added near the floor for the children. Each light now has one job, and the household can choose which ones to use.
Common mistakes and what to do instead.
| Mistake | What happens | Remedy |
|---|---|---|
| Choosing the mirror after rough-in | The power point sits in the wrong place and the cable shows. | Decide the mirror size, height and type before the electrician starts. |
| Only overhead light | Shadows on the face at the mirror. | Add front or side lighting at face height. |
| One switch for everything | Bright light at night, fan that nobody turns on. | Separate switching, fan on a run-on timer. |
| Buying fittings without checking ratings | Fittings cannot be used where planned. | Have the electrician confirm the permitted system and IP rating for each position first. |
| Relying on a backlit glow for the face | The mirror looks good but the face is still in shadow. | Check the model’s front output, or add wall lights either side. |
| Deciding on floor heating late | It cannot be added after tiling. | Decide before waterproofing and tiling are scheduled. |
Lighting brief builder.
Tick what applies. The builder lists the light points, switching and connections you want to discuss with the electrician, ready to download and bring to the measure. It is a list of wishes and questions, not an electrical design: the electrician decides what is permitted where.
Lighting and mirror questions.
What is the best lighting for a bathroom mirror?
Light that reaches the face from the front or both sides, rather than only from a downlight overhead. A front-lit mirror, a pair of wall lights either side, or a light bar above the mirror can all reduce the shadows a single overhead light casts under the eyes and chin. A backlit mirror's glow around the edge may look good without putting much light on your face, so check the front output of the actual model, ideally lit in a showroom. A high colour rendering rating helps with shaving and make-up.
Can I put a normal light fitting near the shower?
Not necessarily. The electrical Wiring Rules, AS/NZS 3000, set zones around showers, baths and basins that restrict which equipment can go where and what water protection it needs. Your licensed electrician decides the exact positions and the rating each fitting needs. Choose fittings with a stated IP rating and check them with the electrician before buying.
Do LED mirrors need an electrician?
It depends how the mirror is powered. A hard-wired LED mirror or demister, or a new power point behind a mirror, is fixed electrical work, and in Tasmania that must be done by a licensed electrical contractor. The electrician decides whether and where a connection is permitted and places it at rough-in, before the wall is lined. A plug-in mirror sold as an approved appliance and plugged into an existing, suitably located power point is not new wiring, but the electrician should still confirm that point is suitable for it. Plan the mirror width and height before the electrician starts.
Should bathroom lights be warm white or cool white?
Many people choose warm white around 3000 K for a relaxed feel, or neutral white around 4000 K for clearer task lighting at the mirror. Mixing is fine if the mirror light is neutral and the general light is warm on a separate switch. Keep the colour consistent within each group of lights so the room does not look patchy.
Is a night light worth adding?
For households with children or older relatives, a low-level light on a sensor or a separate low switch means nobody has to switch on a bright light at 2 am. It is cheap to add when the electrician is roughing in and awkward to add later.